


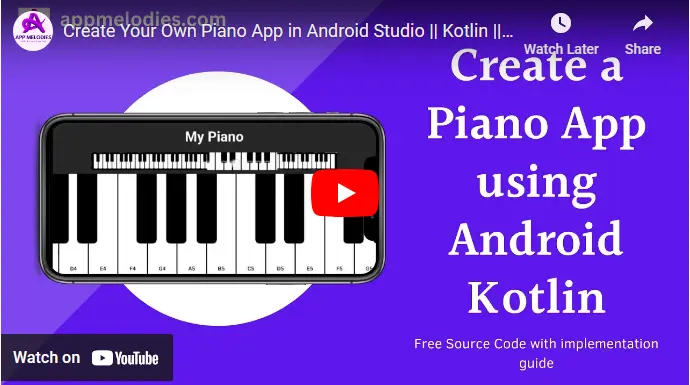
In the realm of mobile app development, creating a piano app using Android Studio with Kotlin offers a harmonious blend of creativity and technical prowess. With the powerful combination of Android Studio and Kotlin, developers can orchestrate a mesmerizing experience for users eager to unleash their inner virtuoso. This step-by-step guide will walk you through the process of crafting an awe-inspiring piano app that resonates with users. To kickstart your journey in developing a captivating piano app, let’s begin by setting up a new project in Android Studio. Follow these simple steps to get started:
Step 1: Create a new project with an empty activity for a Piano App using Android Studio with Kotlin.
Open Android Studio and begin a new project by navigating to “File” > “New” > “New Project.” If you haven’t installed Android Studio, download it from the official website and follow the installation instructions. Configure your project by choosing a name and location. Select the “Empty Activity” template, customize activity details, and choose Kotlin as the programming language. Review settings and click “Finish” to create your project.
Step 2: Optimizing Your Music Player App by Enhancing User Interface with Theme Modification.
To refine your Music Player App’s user experience in Android Studio with Kotlin, customize the theme by navigating to ‘res’ > ‘values’ > ‘themes.xml.’ Locate the parent theme declaration, usually ‘Theme.AppCompat.Light.DarkActionBar,’ and transition to ‘Theme.AppCompat.NoActionBar’ for a cleaner interface. Insert the line within the ‘AppTheme’ section of ‘themes.xml’ to implement this change.
<style name="AppTheme" parent="Theme.AppCompat.NoActionBar">Your theme attributes go here</style>
Step 3: Fine-tuning Button Styles for Enhanced Visual Appeal
To further refine the visual aesthetics and functionality of your Music Player App in Android Studio, it’s crucial to customize the styles for your buttons. This step involves adding specific style codes within the ‘themes.xml’ file.
Below are two distinct button styles, each tailored to meet different design requirements:
					<style name="KeyButtonStyle" parent="Widget.AppCompat.Button"><item name="android:layout_width">74dp</item>
        <item name="android:layout_height">match_parent</item>
        <item name="android:layout_marginStart">2dp</item>
        <item name="android:gravity">bottom|center_horizontal</item>
        <item name="android:paddingBottom">8dp</item>
        <item name="android:textColor">@color/black</item>
        <item name="android:background">@color/white</item></style><style name="SharpkeyButtonStyle" parent="Widget.AppCompat.Button"><item name="android:layout_width">52dp</item>
        <item name="android:layout_height">match_parent</item>
        <item name="android:background">@drawable/black_key_background</item>
        <item name="android:layout_marginTop">-25dp</item></style>
To integrate these styles into your Music Player App, simply incorporate them within the ‘themes.xml’ file. These styles will not only enhance the visual appeal but also contribute to a cohesive and engaging user interface.
Step 4: Color Enhancement: Updating colors.xml for Vibrant UI
In the development journey of your Music Player App, ensuring a visually appealing interface is paramount. Below is the updated ‘colors.xml’ file, which defines two essential colors for your app:
					<?xml version="1.0" encoding="utf-8"?>
<resources>
    <color name="black">#FF000000</color>
    <color name="white">#FFFFFFFF</color>
</resources>
This snippet establishes the hexadecimal values for black and white, allowing you to maintain consistency and coherence in your app’s design. Incorporate these colors into your app’s elements to create a harmonious and captivating user experience.
Step 5: Download Source Code and Resource files zip
Please visit the provided link to download the zip file containing drawable resources for your music player app. Once downloaded, extract the contents of the zip file.
Step 6: Creating "raw" folder and add tones
1. Right-click on the “res” folder in Android Studio.
2. Select “New” and then “Android Resource Directory”.
3. Choose “raw” as the Resource type and click the OK button.
4. You’ll notice that a new raw folder is created within the layout folder.
5. Navigate to the downloaded folder and locate the raw folder.
6. Open the raw folder and select all the files.
7. Copy the selected files.
8. Return to Android Studio, right-click on the raw folder, and select “Paste”.
9. Click OK to confirm the paste action.
10. That’s it! Your resources are now successfully added to the raw folder in your project.
Step 7: Add drawable files for Piano App using Android Studio with Kotlin
1. Go to the downloaded folder where you’ll find the drawable files.
2. Select all the drawable files.
3. Copy the selected drawable files.
4. Open Android Studio and locate the “res” folder in your project.
5. Inside the “res” folder, find the “drawable” folder.
6. Right-click on the “drawable” folder and select “Paste”.
7. If prompted, choose “Replace” or “Replace with New”.
8. That’s it! The drawable files have now been successfully added to your project’s drawable folder for a Piano App using Android Studio with Kotlin.
Step 8: Add activity_main.xml code for Piano App using Android Studio with Kotlin
1. Navigate to the downloaded folder where you’ll find the “activity_main.xml” file.
2. Copy the “activity_main.xml” file.
3. Open Android Studio and locate the “layout” folder in your project.
4. Right-click on the “layout” folder and select “Paste”.
5. Choose “Replace with New” when prompted.
6. That’s it! The “activity_main.xml” file has now been successfully added to your project’s layout folder for a Piano App using Android Studio with Kotlin.
Step 9: Add MainActivity.kt code for Piano App using Android Studio with Kotlin
1. Navigate to the downloaded folder where you’ll find the “MainActivity.kt” file.
2. Copy the “MainActivity.kt” file.
3. Open Android Studio and locate the “java” folder in your project.
4. Navigate to your app’s package name (e.g., “com.example.myapp”) and find the “MainActivity.kt” file.
5. Right-click on the “MainActivity.kt” file and select “Paste”.
6. Choose “Replace” or “Replace with New” if prompted.
7. That’s it! The “MainActivity.kt” file has now been successfully added to your project’s source code.
Step 10: Run Your App
After customizing all things, it’s time to see your changes in action. Simply click on the green play button located in the toolbar or select “Run” from the top menu and choose “Run ‘app'” to launch your Piano App using Android Studio with Kotlin on either a connected device or an emulator. Observe how your app looks and behaves with the new theme, ensuring that it aligns with your desired user experience.
you may also like this posts: https://appmelodies.com/music-player-app-in-android-studio-using-kotlin/


Thank you soo much. very hepfull.keepit up
hii