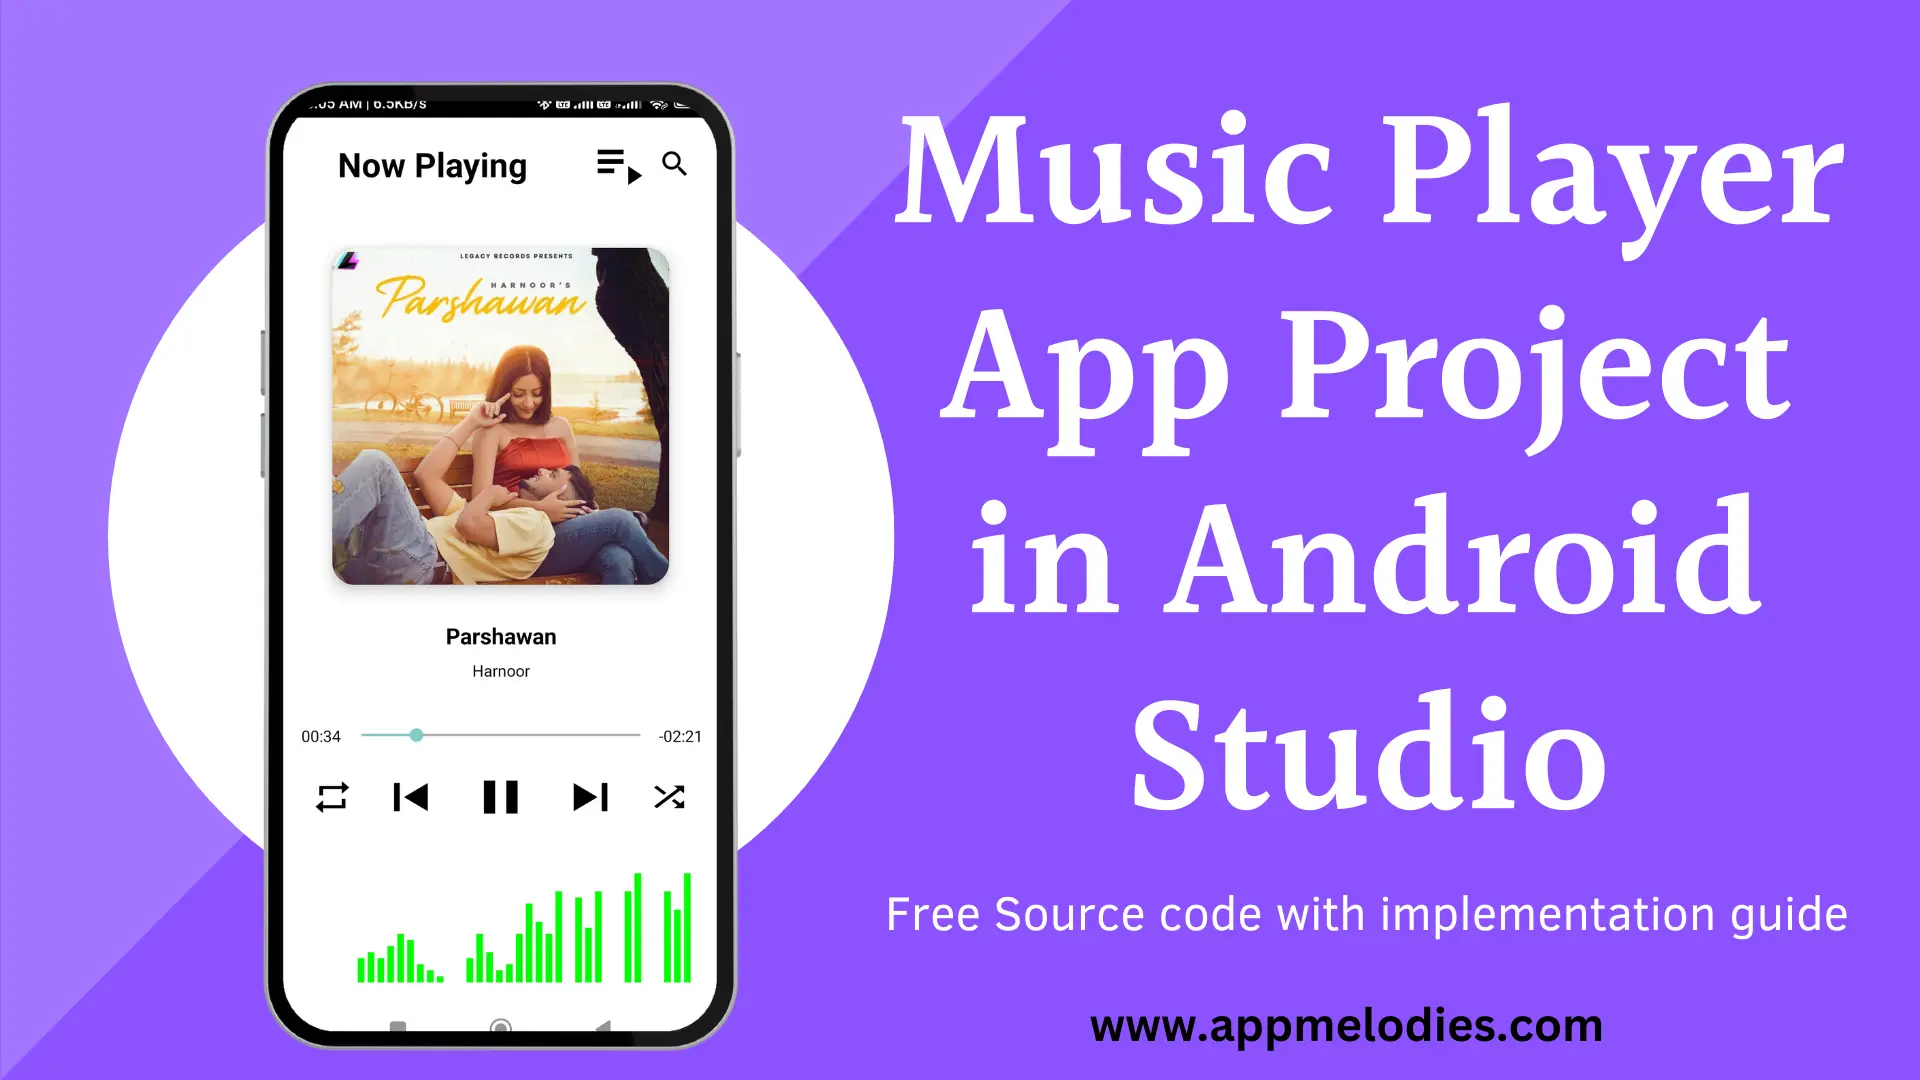
Introduction: Are you eager to venture into the world of Android app development? Crafting your very own Music Player App in Android Studio Using Kotlin is an exhilarating starting point, made even more delightful with Kotlin and Android Studio. In this easy-to-follow guide, we’ll embark on a journey together, creating a simple yet functional music player app tailored for beginners. So, let’s dive into the coding adventure!
Step 1: Setting Up Your Project For Music Player App in Android Studio Using Kotlin
To kick things off, fire up Android Studio and initiate a new project. Opt for an “Empty Activity” and assign a name to your project. Don’t forget to pick Kotlin as your preferred programming language.
Step 2: Crafting the User Interface by changing theme
In your Android Studio project, navigate to the ‘res’ folder, then delve into the ‘values’ directory and open ‘themes.xml’.
Within ‘themes.xml’, locate the parent theme declaration. Typically, it’s set to ‘Theme.AppCompat.Light.DarkActionBar’ or a similar theme.
Now, for a sleek and uncluttered user interface, it’s time to implement the ‘Theme.AppCompat.NoActionBar’ theme. This theme strips away the action bar, providing a minimalist canvas for your Music Player App in Android Studio Using Kotlin.
Simply append the following line within the ‘AppTheme’ section of ‘themes.xml’:
<style name="AppTheme" parent="Theme.AppCompat.NoActionBar">Your theme attributes go here</style>
Step 3: Setting Up Dependencies for Music Player App in Android Studio Using Kotlin
Open your project’s ‘build.gradle’ file.
Under the ‘dependencies’ block, add the following lines to include the necessary libraries:
					implementation 'com.squareup.picasso:picasso:2.5.2'
implementation 'androidx.recyclerview:recyclerview:1.2.1'
implementation 'com.github.bumptech.glide:glide:4.12.0'
implementation "androidx.media:media:1.4.0"
These dependencies are essential for loading images, handling lists efficiently, and managing media playback within your music player app.
Step 4: Defining Custom Colors for Visual Enhancement
In your project’s ‘colors.xml’ file, add the following color definitions to customize the visual appearance of your music player app.
					<?xml version="1.0" encoding="utf-8"?>
<resources>
    <color name="black">#FF000000</color>
    <color name="white">#FFFFFFFF</color>
    <color name="green">#43A047</color>
    <color name="shuffleOnColor">#FFA500</color>
    <color name="shuffleOffColor">#808080</color>

</resources>
Step 5: Configuring Permissions for App Functionality
In your AndroidManifest.xml file, add the necessary permissions to ensure seamless operation of your music player app:
					<uses-permission android:name="android.permission.POST_NOTIFICATIONS" />
<uses-permission android:name="android.permission.READ_EXTERNAL_STORAGE"
    android:maxSdkVersion="32" />
<uses-permission android:name="android.permission.FOREGROUND_SERVICE" />
<uses-permission android:name="android.permission.RECORD_AUDIO" />
<uses-permission android:name="android.permission.WAKE_LOCK" />
Step 6: Defining Services and Receivers for App Integration
In the same file, within the <application> tag, define services and receivers required for managing background tasks and handling notification actions:
					<service
    android:name=".MusicService"
    android:foregroundServiceType="mediaPlayback" />

<receiver
    android:name=".NotificationActionReceiver"
    android:enabled="true"
    android:exported="false">
    <intent-filter>
        <action android:name="com.ex.musicplayer.ACTION_PLAY_PREVIOUS" />
        <action android:name="com.ex.musicplayer.ACTION_TOGGLE_PLAYBACK" />
        <action android:name="com.ex.musicplayer.ACTION_PLAY_NEXT" />
    </intent-filter>
</receiver>
Step 7: Customizing App Icons and Graphics for Music Player App in Android Studio Using Kotlin
Visit the provided link to download the zip file containing drawable resources for your music player app.
Extract the contents of the downloaded zip file.
Copy all XML files from the extracted folder into the ‘drawable’ folder of your Android Studio project.
These customized drawables will enhance the visual appeal of your music player app, providing a personalized touch to its interface.
Step 8: Enhancing User Interface with Custom Layouts
Access the provided link to download a zip file containing layout resources tailored for your music player app.
Once downloaded, extract the contents of the zip file.
Copy all XML layout files from the extracted folder into the ‘layout’ directory of your Android Studio project.
These custom layout files will elevate the aesthetic appeal and user experience of your music player app, offering a tailored interface for your users to navigate effortlessly.
Step 9: Incorporating Kotlin Functionality
Download the zip file containing Kotlin files tailored for your music player app from the provided link.
After downloading, extract the contents of the zip file.
Navigate to the Kotlin files within the extracted folder. You’ll find files such as activities, fragments, and utility classes.
For instance, let’s say you have a Kotlin file named “MainActivity.kt”. Open this file in a text editor or Android Studio.
Within the file, locate the package declaration at the top. It will look something like this:
package com.example.musicplayer
Replace “com.example.musicplayer” with your actual project package name. For example, if your project package name is “com.mycompany.mymusicplayer”, the package declaration should be:
package com.mycompany.mymusicplayer
Repeat this step for all Kotlin files in the downloaded folder.
Once you’ve updated the package names, copy these Kotlin files into the appropriate directories within your Android Studio project.
These Kotlin files contain the logic and functionality of your music player app, tailored to seamlessly integrate with your project package structure.
Step 10: Customizing the Visualizer View
In your ‘activity_main.xml’ file, locate the line number 238 where the CustomVisualizerView is defined:
					<com.ex.musicplayer.CustomVisualizerView
    android:id="@+id/visualizerView"
    android:layout_width="match_parent"
    android:visibility="gone"
    android:layout_height="120dp"
    android:layout_alignBottom="@+id/recyclerView"
    android:layout_centerHorizontal="true"
    android:layout_marginBottom="2dp"
    android:background="#FFFFFF"
/>
Replace the package name “com.ex.musicplayer” with your project’s package name. For example, if your project package name is “com.mycompany.mymusicplayer”, the line should be:
					<com.mycompany.mymusicplayer.CustomVisualizerView
    android:id="@+id/visualizerView"
    android:layout_width="match_parent"
    android:visibility="gone"
    android:layout_height="120dp"
    android:layout_alignBottom="@+id/recyclerView"
    android:layout_centerHorizontal="true"
    android:layout_marginBottom="2dp"
    android:background="#FFFFFF"
/>
Additionally, make sure to add “.CustomVisualizerView” after the package name, as shown above.
This step ensures that the Visualizer View component in your layout is linked correctly to the CustomVisualizerView class within your project, allowing you to customize and interact with it seamlessly.
Step 11: Updating Intent Filter Package Names
In your ‘AndroidManifest.xml’ file, locate the intent filter section where actions are defined, typically within a receiver or service declaration.
For example:
					<intent-filter>
    <action android:name="com.ex.khhjvk.ACTION_PLAY_PREVIOUS" />
    <action android:name="com.ex.khhjvk.ACTION_TOGGLE_PLAYBACK" />
    <action android:name="com.ex.khhjvk.ACTION_PLAY_NEXT" />
</intent-filter>
Replace the package name “com.ex.khhjvk” with your project’s package name.
For instance, if your project package name is “com.mycompany.mymusicplayer”, the intent filter should be:
					<intent-filter>
    <action android:name="com.mycompany.mymusicplayer.ACTION_PLAY_PREVIOUS" />
    <action android:name="com.mycompany.mymusicplayer.ACTION_TOGGLE_PLAYBACK" />
    <action android:name="com.mycompany.mymusicplayer.ACTION_PLAY_NEXT" />
</intent-filter>
This ensures that the intent filter actions are associated with the correct package name in your music player app, enabling seamless communication between components.
Step 12: Running Your Music Player App in Android Studio Using Kotlin
With all the necessary resources, dependencies, and configurations in place, it’s time to launch your music player app.
Connect your Android device to your computer via USB, or set up a virtual device using Android Studio’s AVD Manager.
In Android Studio, select your device from the dropdown menu or choose the virtual device you’ve set up.
Click on the “Run” button (usually a green triangle) in the toolbar, or go to “Run” > “Run ‘app'” in the top menu.
Wait for the app to build and install on your device. Once installed, you’ll see the app icon on your device’s home screen or app drawer.
Tap on the icon to open your music player app and start exploring its features.
Congratulations! You’ve successfully built and launched your own music player app. Enjoy the melodic journey! Visit our youtube channel for more stuffs






which version is best for this music player app for android studio?
please answer for me. Thank you.