Introduction:
Calculator App with Kotlin in Android Studio: In the ever-evolving world of mobile technology, Android development stands out as a dynamic field offering immense opportunities for innovation and creativity. With Kotlin becoming the preferred language for Android app development and Android Studio serving as the go-to integrated development environment (IDE), mastering Android development has never been more exciting. In this tutorial, we will embark on a journey to build a simple yet powerful Calculator App with Kotlin in Android Studio, providing you with valuable insights and practical experience to elevate your Android development skills.
Understanding the Basics: Before diving into the development process, let’s briefly cover the key concepts and tools we’ll be using:
Kotlin: Kotlin is a modern, statically typed programming language that is fully interoperable with Java. It offers concise syntax, null safety, and numerous other features that make Android development more efficient and enjoyable.
Android Studio: Android Studio is the official IDE for Android app development, providing a robust set of tools for designing, coding, testing, and debugging Android applications.
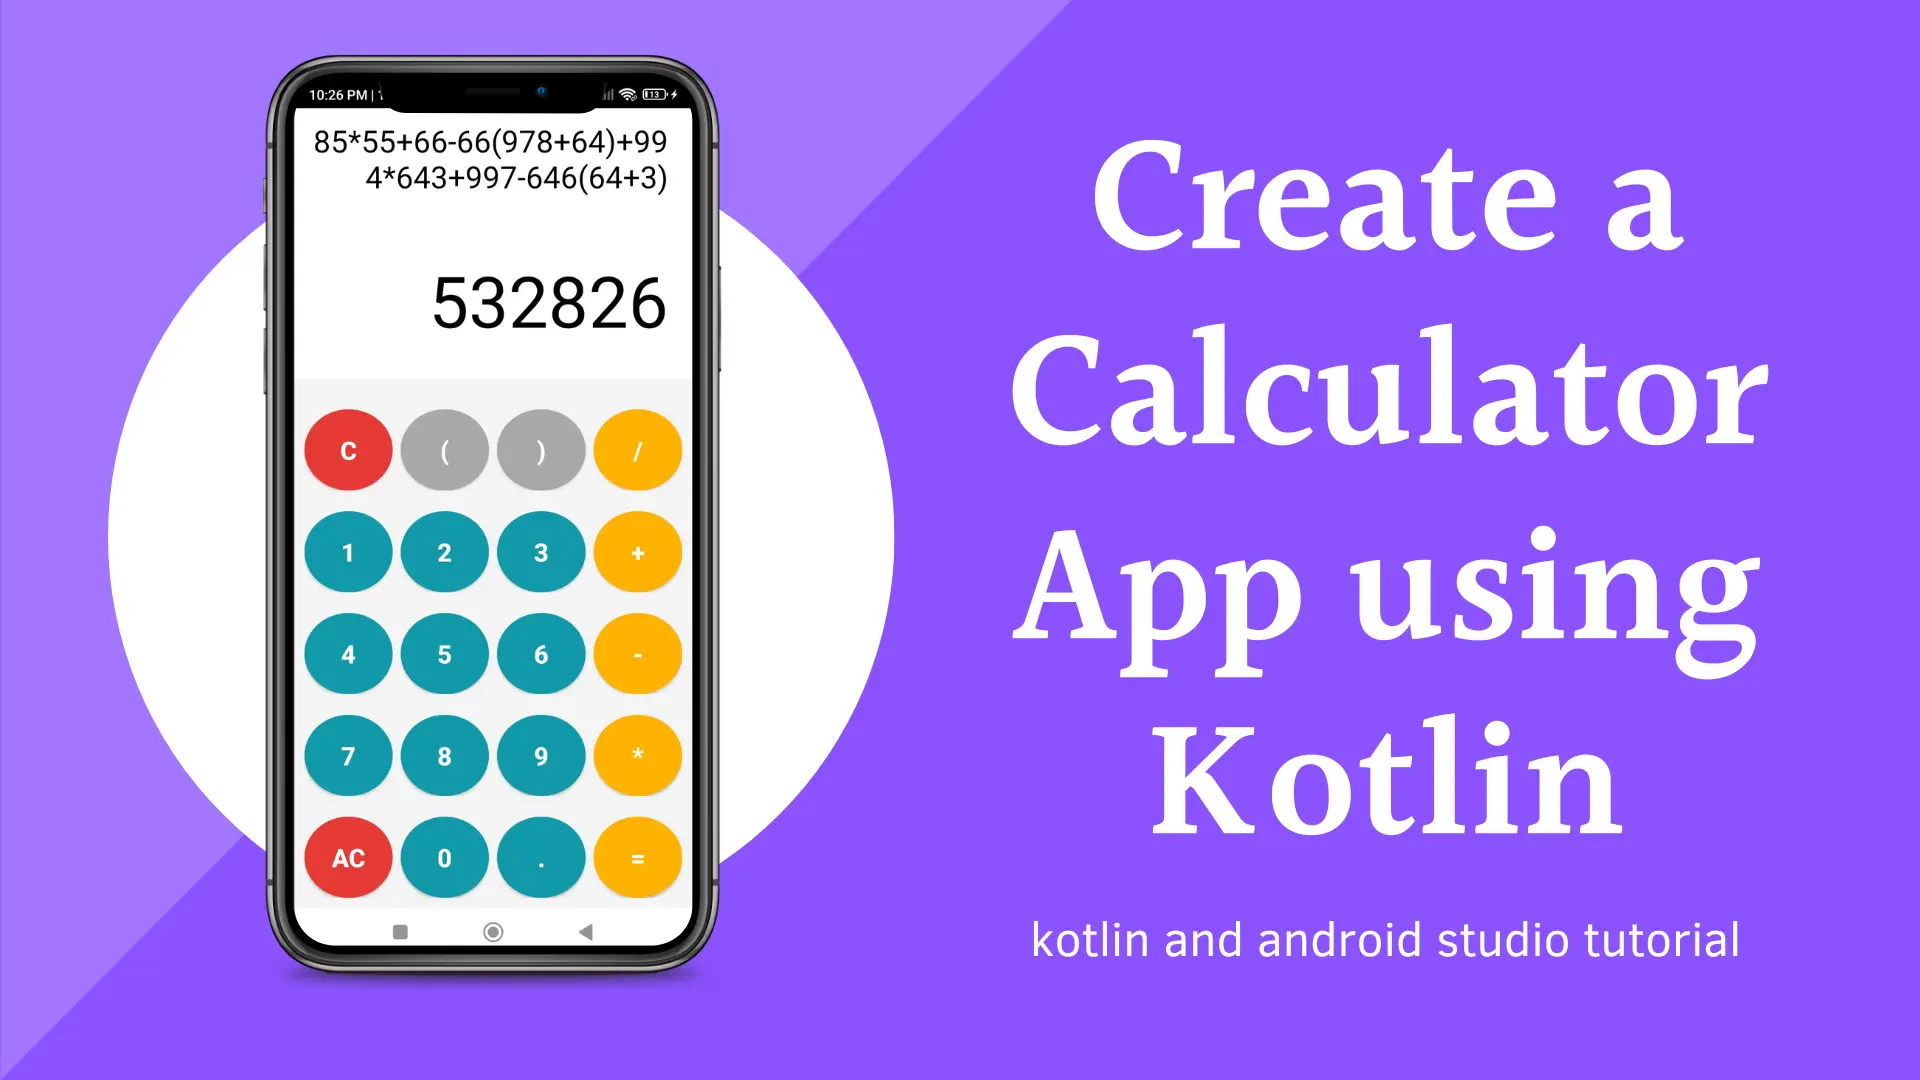
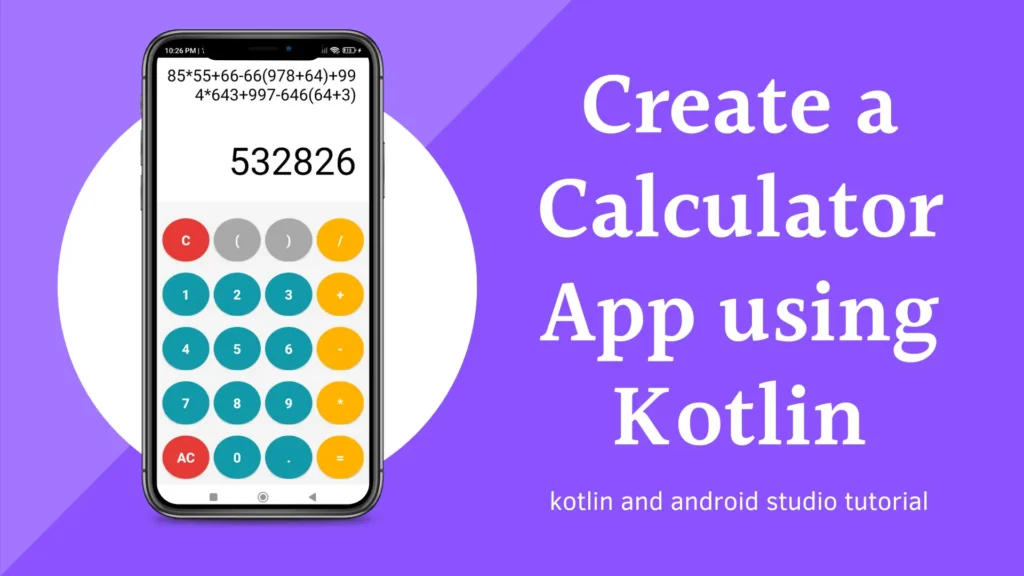
Calculator App with Kotlin in Android Studio: Our goal is to create a simple calculator app capable of performing basic arithmetic operations such as addition, subtraction, multiplication, and division.
Now, without further ado, let’s dive into the development process.
Step 1: Setting Up the Project for Calculator App with Kotlin in Android Studio
- Open Android Studio and create a new Kotlin project.
- Choose an appropriate project name and package name.
- Select the minimum SDK version and other project settings as per your requirements.
Step 2: Implementing Custom Theme for Calculator App with Kotlin in Android Studio
- Now, let’s make our calculator look sleek and stylish with a custom theme. In the
themes.xmlfile (usually located in theres/valuesdirectory), add the following style definition:
					<style name="Base.Theme.Calculator" parent="Theme.AppCompat.NoActionBar">Customize theme attributes here -->
    <!-- For example, you can customize colors, fonts, etc.</style>
Step 3: Adding the exp4j Dependency for Calculator App with Kotlin in Android Studio
- To supercharge our calculator with advanced mathematical capabilities, we’ll need to add a dependency. In your app’s build.gradle file (located in the app module), add the following line to the dependencies block:
implementation 'net.objecthunter:exp4j:0.4.8'
Step 4: Implementing Custom Colors Calculator App with Kotlin in Android Studio
Let’s add some personality to our app with custom colors. In the colors.xml file (usually located in the res/values directory), add the following color definitions:
					<?xml version="1.0" encoding="utf-8"?>
<resources>
    <color name="black">#FF000000</color>
    <color name="white">#FFFFFFFF</color>
    <color name="navi">#1199AA</color>
    <color name="red">#E53935</color>
    <color name="yellow">#FFB300</color>
</resources>
Step 5: Creating a Custom Drawable for Rounded Buttons Let’s add some style to our calculator buttons with rounded corners.
- Create a new drawable resource file named “rounded_button.xml”.
- Add the following code to the “rounded_button.xml” file:
					<?xml version="1.0" encoding="utf-8"?>
<shape xmlns:android="http://schemas.android.com/apk/res/android"
    android:shape="oval">
    <solid android:color="#A8A8A8" />
    <size
        android:width="80dp"
        android:height="80dp" />
</shape>
Step 6: Designing the User Interface (UI) for Calculator App with Kotlin in Android Studio
- Open the “activity_main.xml” layout file.
- Add following code into it.
					<?xml version="1.0" encoding="utf-8"?>
<LinearLayout xmlns:android="http://schemas.android.com/apk/res/android"
    android:layout_width="match_parent"
    android:layout_height="match_parent"
    android:background="@color/white"
    android:orientation="vertical">


    <EditText
        android:id="@+id/editText"
        android:textSize="30sp"
        android:textAlignment="textEnd"
        android:layout_marginRight="20sp"
        android:textColor="@color/black"
        android:layout_marginBottom="20dp"
        android:layout_width="match_parent"
        android:text="0"
        android:layout_height="100dp"
        android:hint="0" />


    <LinearLayout
        android:orientation="vertical"
        android:gravity="bottom"
        android:layout_width="match_parent"
        android:layout_height="match_parent">


        <EditText
            android:id="@+id/resultTextView"
            android:textSize="70sp"
            android:textAlignment="textEnd"
            android:layout_marginRight="20sp"
            android:textColor="@color/black"
            android:layout_marginBottom="20dp"
            android:layout_width="match_parent"
            android:text="0"
            android:layout_height="wrap_content"
            android:hint="0" />


        <LinearLayout
            android:paddingTop="20sp"
            android:background="#F4F4F4"
            android:orientation="vertical"
            android:layout_width="match_parent"
            android:layout_height="wrap_content">

        <LinearLayout
            android:layout_width="match_parent"
            android:padding="10dp"
            android:layout_height="wrap_content"
            android:orientation="horizontal">

            <Button
                android:id="@+id/backspace"
                android:layout_width="0dp"
                android:layout_height="wrap_content"
                android:text="C"
                android:textSize="25sp"
                android:layout_weight="1"
                android:background="@drawable/rounded_button"
                android:textStyle="bold"
                android:layout_marginRight="8dp"/>

            <Button
                android:id="@+id/buttonBr1"
                android:layout_width="0dp"
                android:layout_height="wrap_content"
                android:text="("
                android:textSize="25sp"
                android:layout_weight="1"
                android:background="@drawable/rounded_button"
                android:textStyle="bold"
                android:layout_marginRight="8dp"/>

            <Button
                android:id="@+id/buttonBr2"
                android:layout_width="0dp"
                android:layout_height="wrap_content"
                android:text=")"
                android:textSize="25sp"
                android:layout_weight="1"
                android:background="@drawable/rounded_button"
                android:textStyle="bold"
                android:layout_marginRight="8dp"/>

            <Button
                android:id="@+id/buttonDivide"
                android:layout_width="0dp"
                android:layout_height="wrap_content"
                android:text="/"
                android:textSize="25sp"
                android:layout_weight="1"
                android:background="@drawable/rounded_button"
                android:textStyle="bold"/>
        </LinearLayout>

        <LinearLayout
            android:layout_width="match_parent"
            android:padding="10dp"
            android:layout_height="wrap_content"
            android:orientation="horizontal">

            <Button
                android:id="@+id/button1"
                android:layout_width="0dp"
                android:layout_height="wrap_content"
                android:text="1"
                android:textSize="25sp"
                android:layout_weight="1"
                android:background="@drawable/rounded_button"
                android:textStyle="bold"
                android:layout_marginRight="8dp"/>

            <Button
                android:id="@+id/button2"
                android:layout_width="0dp"
                android:layout_height="wrap_content"
                android:text="2"
                android:textSize="25sp"
                android:layout_weight="1"
                android:background="@drawable/rounded_button"
                android:textStyle="bold"
                android:layout_marginRight="8dp"/>

            <Button
                android:id="@+id/button3"
                android:layout_width="0dp"
                android:layout_height="wrap_content"
                android:text="3"
                android:textSize="25sp"
                android:layout_weight="1"
                android:background="@drawable/rounded_button"
                android:textStyle="bold"
                android:layout_marginRight="8dp"/>

            <Button
                android:id="@+id/buttonAdd"
                android:layout_width="0dp"
                android:layout_height="wrap_content"
                android:text="+"
                android:textSize="25sp"
                android:layout_weight="1"
                android:background="@drawable/rounded_button"
                android:textStyle="bold"/>
        </LinearLayout>

        <LinearLayout
            android:layout_width="match_parent"
            android:padding="10dp"
            android:layout_height="wrap_content"
            android:orientation="horizontal">

            <Button
                android:id="@+id/button4"
                android:layout_width="0dp"
                android:layout_height="wrap_content"
                android:text="4"
                android:textSize="25sp"
                android:layout_weight="1"
                android:background="@drawable/rounded_button"
                android:textStyle="bold"
                android:layout_marginRight="8dp"/>

            <Button
                android:id="@+id/button5"
                android:layout_width="0dp"
                android:layout_height="wrap_content"
                android:text="5"
                android:textSize="25sp"
                android:layout_weight="1"
                android:background="@drawable/rounded_button"
                android:textStyle="bold"
                android:layout_marginRight="8dp"/>

            <Button
                android:id="@+id/button6"
                android:layout_width="0dp"
                android:layout_height="wrap_content"
                android:text="6"
                android:textSize="25sp"
                android:layout_weight="1"
                android:background="@drawable/rounded_button"
                android:textStyle="bold"
                android:layout_marginRight="8dp"/>

            <Button
                android:id="@+id/buttonSubtract"
                android:layout_width="0dp"
                android:layout_height="wrap_content"
                android:text="-"
                android:textSize="25sp"
                android:layout_weight="1"
                android:background="@drawable/rounded_button"
                android:textStyle="bold"/>
        </LinearLayout>

        <LinearLayout
            android:layout_width="match_parent"
            android:layout_height="wrap_content"
            android:padding="10dp"
            android:orientation="horizontal">

            <Button
                android:id="@+id/button7"
                android:layout_width="0dp"
                android:layout_height="wrap_content"
                android:text="7"
                android:textSize="25sp"
                android:layout_weight="1"
                android:background="@drawable/rounded_button"
                android:textStyle="bold"
                android:layout_marginRight="8dp"/>

            <Button
                android:id="@+id/button8"
                android:layout_width="0dp"
                android:layout_height="wrap_content"
                android:text="8"
                android:textSize="25sp"
                android:layout_weight="1"
                android:background="@drawable/rounded_button"
                android:textStyle="bold"
                android:layout_marginRight="8dp"/>

            <Button
                android:id="@+id/button9"
                android:layout_width="0dp"
                android:layout_height="wrap_content"
                android:text="9"
                android:textSize="25sp"
                android:layout_weight="1"
                android:background="@drawable/rounded_button"
                android:textStyle="bold"
                android:layout_marginRight="8dp"/>

            <Button
                android:id="@+id/buttonMultiply"
                android:layout_width="0dp"
                android:layout_height="wrap_content"
                android:text="*"
                android:textSize="25sp"
                android:layout_weight="1"
                android:background="@drawable/rounded_button"
                android:textStyle="bold"/>
        </LinearLayout>

        <LinearLayout
            android:padding="10dp"
            android:layout_width="match_parent"
            android:layout_height="wrap_content"
            android:orientation="horizontal">


            <Button
                android:id="@+id/AC"
                android:layout_width="0dp"
                android:layout_height="wrap_content"
                android:text="AC"
                android:textSize="25sp"
                android:layout_weight="1"
                android:background="@drawable/rounded_button"
                android:textStyle="bold"
                android:layout_marginRight="8dp"/>


            <Button
                android:id="@+id/button0"
                android:layout_width="0dp"
                android:layout_height="wrap_content"
                android:text="0"
                android:textSize="25sp"
                android:layout_weight="1"
                android:background="@drawable/rounded_button"
                android:textStyle="bold"
                android:layout_marginRight="8dp"/>


            <Button
                android:id="@+id/buttonDot"
                android:layout_width="0dp"
                android:layout_height="wrap_content"
                android:text="."
                android:textSize="25sp"
                android:layout_weight="1"
                android:background="@drawable/rounded_button"
                android:textStyle="bold"
                android:layout_marginRight="8dp"/>


            <Button
                android:id="@+id/buttonEquals"
                android:layout_width="0dp"
                android:layout_height="wrap_content"
                android:text="="
                android:textSize="25sp"
                android:layout_weight="1"
                android:background="@drawable/rounded_button"
                android:textStyle="bold"/>
        </LinearLayout>


        </LinearLayout>


    </LinearLayout>


</LinearLayout>
Step 7: Implementing MainActivity Code Let’s bring our calculator app to life by adding the necessary code to the MainActivity.
- Open the “MainActivity.kt” file.
- Add following code into it.
import android.graphics.PorterDuff
import android.os.Bundle
import android.text.Editable
import android.text.TextWatcher
import android.view.View
import android.widget.Button
import android.widget.EditText
import androidx.appcompat.app.AppCompatActivity
import androidx.core.content.ContextCompat
import net.objecthunter.exp4j.ExpressionBuilder
import java.lang.Exception

class MainActivity : AppCompatActivity() {

    private lateinit var editText: EditText
    private lateinit var resultTextView : EditText

    override fun onCreate(savedInstanceState: Bundle?) {
        super.onCreate(savedInstanceState)
        setContentView(R.layout.activity_main)

        editText = findViewById(R.id.editText)
        resultTextView = findViewById(R.id.resultTextView)

        setupInputChangeListener()

        val buttonIds = arrayOf(
            R.id.button0, R.id.button1, R.id.button2, R.id.button3, R.id.button4,
            R.id.button5, R.id.button6, R.id.button7, R.id.button8, R.id.button9,
            R.id.buttonDot, R.id.buttonAdd, R.id.buttonSubtract, R.id.buttonMultiply,
            R.id.buttonDivide, R.id.buttonBr1, R.id.buttonBr2, R.id.backspace,
            R.id.AC, R.id.buttonEquals
        )

        for (buttonId in buttonIds) {
            val button = findViewById<Button>(buttonId)
            if (buttonId in arrayOf(R.id.buttonDot, R.id.button0,R.id.button1, R.id.button2, R.id.button3, R.id.button4, R.id.button5, R.id.button6, R.id.button7, R.id.button8, R.id.button9)) {
                val color = ContextCompat.getColor(this, R.color.navi)
                val drawable = ContextCompat.getDrawable(this, R.drawable.rounded_button)
                drawable?.setColorFilter(color, PorterDuff.Mode.SRC)

                button.background = drawable
            }

            if (buttonId in arrayOf(R.id.buttonEquals, R.id.buttonAdd, R.id.buttonSubtract, R.id.buttonMultiply, R.id.buttonDivide)) {
                val color = ContextCompat.getColor(this, R.color.yellow)
                val drawable = ContextCompat.getDrawable(this, R.drawable.rounded_button)
                drawable?.setColorFilter(color, PorterDuff.Mode.SRC)

                button.background = drawable
            }

            if (buttonId in arrayOf(R.id.backspace, R.id.AC)) {
                val color = ContextCompat.getColor(this, R.color.red)
                val drawable = ContextCompat.getDrawable(this, R.drawable.rounded_button)
                drawable?.setColorFilter(color, PorterDuff.Mode.SRC)

                button.background = drawable
            }

            button.setOnClickListener { onButtonClick(it) }
        }

        findViewById<Button>(R.id.buttonEquals).setOnClickListener { onEqualsButtonClick() }
    }

    private fun setupInputChangeListener() {
        editText.addTextChangedListener(object : TextWatcher {
            override fun beforeTextChanged(s: CharSequence?, start: Int, count: Int, after: Int) {}

            override fun onTextChanged(s: CharSequence?, start: Int, before: Int, count: Int) {
                // Calculate and display result while typing
                val expression = s.toString()
                try {
                    val result = evaluateExpression(expression)
                    resultTextView.setText(result.toString())
                } catch (e: Exception) {
                    // Handle invalid expressions
                    resultTextView.text.clear()
                }
            }

            override fun afterTextChanged(s: Editable?) {}
        })
    }


    private fun onButtonClick(view: View) {
        val button = view as Button
        val buttonText = button.text.toString()
        val currentText = editText.text.toString()

        when (buttonText) {
            "AC" -> editText.setText("")
            "C" -> {
                if (currentText.isNotEmpty()) {
                    editText.setText(currentText.dropLast(1))
                }
            }
            else -> editText.setText(currentText + buttonText)
        }
    }

    private fun onEqualsButtonClick() {
        val currentText = editText.text.toString()
        try {
            val result = evaluateExpression(currentText)
            val resultInt = result.toInt() // Convert result to integer
            resultTextView.text = Editable.Factory.getInstance().newEditable(resultInt.toString())
        } catch (e: Exception) {
            editText.setText("Error: ${e.message}")
        }
    }


    private fun evaluateExpression(expression: String): Int {
        return ExpressionBuilder(expression).build().evaluate().toInt()
    }

}
Step 8: Running and Testing the App Now that we’ve built our Calculator App with Kotlin in Android Studio and implemented the necessary code, it’s time to run and test it to ensure everything works smoothly.
- Connect your Android device or set up an emulator.
- Click on the “Run” button in Android Studio.
- Test all calculator functionalities.
- Check for accuracy and responsiveness.
- Debug any issues using Android Studio tools.
- Celebrate your success with your Calculator App with Kotlin in Android Studio!


